Archive for March 2015
These are Transaction Control Language (TCL) statements used to manage the changes made by DML statements.
Rollback:
This is used for undoing the work done in the current transaction. It will restore database to original state since the last COMMIT.This command also releases the locks if any hold by the current transaction.
The command used in SQL for this is simply:
ROLLBACK;
All the transactions will be undone once we rollback.
Savepoint:
This is used for identifying a point in the transaction to which a programmer can later roll back. That is it is possible for the programmer to divide a big transaction into subsections each having a savepoint defined in it.
The command used in SQL for this is simply:
SAVEPOINT savepointname;
For example:
UPDATE…..
DELETE….
SAVEPOINT e1;
INSERT….
UPDATE….
SAVEPOINT e2; …
It is also possible to define savepoint and rollback together so that programmer can achieve rollback of part of a transaction. Say for instance in the above
ROLLBACK TO SAVEPOINT e2;
This results in the rollback of all statements after savepoint e2
Commit:
This is used to end the transaction and make the changes permanent. When commit is performed all save points are erased and transaction locks are released. In other words commit ends a transaction and marks the beginning of a new transaction.
This command used to make the database changes permanent(i.e.save work done).
we can't perform Roll Back once we commit the transaction.
The command used in SQL for this is simply:
COMMIT;
There are 4 types of SQL commands or statements in oracle as given below :
DDL
Data Definition Language (DDL) statements are used to define the database structure or schema.
Some examples:
CREATE - to create objects like Table,Views,Sequences,Indexes,Synonyms etc. in the database
ALTER - alters the structure of the database
DROP - delete objects like Table,Views,Sequences,Indexes,Synonyms etc. from the database
TRUNCATE - remove all records from a table, including all spaces allocated for the records are removed
COMMENT - add comments to the data dictionary
RENAME - rename an object
DML
Data Manipulation Language (DML) statements are used for accessing and managing data within relational database tables.
Some examples:
SELECT - retrieve data from the a database tables
INSERT - insert data into a table
UPDATE - updates existing data within a table
DELETE - deletes specific or all records from a table, the space for the records remain
MERGE - UPSERT operation (insert or update)
CALL - call a PL/SQL or Java subprogram
EXPLAIN PLAN - explain access path to data
LOCK TABLE - control concurrency
DCL
Data Control Language (DCL) statements are used to control privileges in database.
To perform any operation in database such as creating tables,views or perform insert,delete to table we need privileges.
Some examples:
GRANT - gives user's access privileges to database
REVOKE - withdraw access privileges given with the GRANT command
The operations for which privileges may be granted to or revoked from a user or role may include CONNECT, SELECT, INSERT, UPDATE, DELETE, EXECUTE, and USAGE.
TCL
Transaction Control Language (TCL) statements are used to manage the changes made by DML statements.
It allows statements to be grouped together into logical transactions.
COMMIT - save work done
SAVEPOINT - identify a point in a transaction to which you can later roll back or return
ROLLBACK - restore database to original since the last COMMIT
SET TRANSACTION - Change transaction options like isolation level and what rollback segment to use
DDL
Data Definition Language (DDL) statements are used to define the database structure or schema.
Some examples:
CREATE - to create objects like Table,Views,Sequences,Indexes,Synonyms etc. in the database
ALTER - alters the structure of the database
DROP - delete objects like Table,Views,Sequences,Indexes,Synonyms etc. from the database
TRUNCATE - remove all records from a table, including all spaces allocated for the records are removed
COMMENT - add comments to the data dictionary
RENAME - rename an object
DML
Data Manipulation Language (DML) statements are used for accessing and managing data within relational database tables.
Some examples:
SELECT - retrieve data from the a database tables
INSERT - insert data into a table
UPDATE - updates existing data within a table
DELETE - deletes specific or all records from a table, the space for the records remain
MERGE - UPSERT operation (insert or update)
CALL - call a PL/SQL or Java subprogram
EXPLAIN PLAN - explain access path to data
LOCK TABLE - control concurrency
DCL
Data Control Language (DCL) statements are used to control privileges in database.
To perform any operation in database such as creating tables,views or perform insert,delete to table we need privileges.
Some examples:
GRANT - gives user's access privileges to database
REVOKE - withdraw access privileges given with the GRANT command
The operations for which privileges may be granted to or revoked from a user or role may include CONNECT, SELECT, INSERT, UPDATE, DELETE, EXECUTE, and USAGE.
In the Oracle database, executing a DCL command issues an implicit commit. Hence you cannot roll back the command.
TCL
Transaction Control Language (TCL) statements are used to manage the changes made by DML statements.
It allows statements to be grouped together into logical transactions.
COMMIT - save work done
SAVEPOINT - identify a point in a transaction to which you can later roll back or return
ROLLBACK - restore database to original since the last COMMIT
SET TRANSACTION - Change transaction options like isolation level and what rollback segment to use
SQL DELETE Statement:
The DELETE command is used to remove rows from a table. A WHERE clause can be used to only remove some rows. If no WHERE condition is specified, all rows will be removed.It provides the facility of conditional-based deletion
Syntax to SQL DELETE:
DELETE FROM table_name [WHERE condition];
Eg. DELETE FROM CUSTOMER WHERE CUSTOMER_ID=107;
(This will delete only one customer record whose id is 107)
OR DELETE FROM CUSTOMER; (This will delete the all customer records)
SQL TRUNCATE Statement:
TRUNCATE removes all rows from a table.The operation cannot be rolled back and no triggers will be fired.
TRUNCATE removes the record permanently.
Syntax to TRUNCATE a table:
TRUNCATE TABLE table_name;
Eg. TRUNCATE TABLE CUSTOMER; (This will delete all customer records)
SQL DROP Statement:
DROP command is a DDL command. It removes the information along with structure. It also removes all information about the table from data dictionary.
The DROP command removes a table from the database. All the tables' rows, indexes and privileges will also be removed. No DML triggers will be fired.
Syntax to DROP a table:
DROP TABLE table_name;
Eg. DROP TABLE CUSTOMER; (This will delete all customer records also the table structure)
1.TRUNCATE ,DROP is a DDL command whereas DELETE is a DML command.
As such, DELETE operations can be rolled back (undone), while DROP and TRUNCATE operations cannot be rolled back.
2.TRUNCATE is much faster than DELETE.
Reason: When you type DELETE.all the data get copied into the Rollback Table-space first.then delete operation get performed.performed. Thats why when you type ROLLBACK after deleting a table ,you can get back the data(The system get it for you from the Rollback Table-space).All this process take time.But when you type TRUNCATE,it removes data directly without copying it into the Rollback Table-space. Thatswhy.Thatswhy TRUNCATE is faster.Once you Truncate you can't get back the data.
3.Drop command will delete the entire rows as well as the structure.But truncate will delete the contents only not the structure, so no need to give specifications for another table creation.
Method
1:
STEP 1
Create a button of type “Create a button in
a region position”.
STEP 2
Set the button’s target to be a URL.

STEP 3
If you
do not want a confirm dialog with the button, set the button’s URL target to
the following (Note: The
below has been put on 3 lines for ease of viewing but should be entered into
the URL target all as one line of text):
javascript:this.disabled=true;this.value='Submitted...';doSubmit('XXXXXX');
If you
DO want a confirm dialog with the button, set the button’s URL target to the
following (Note: The below
has been put on 4 lines for ease of viewing but should be entered into the URL
target all as one line of text):
javascript:if (confirm('Are you sure you
want to?')) {
this.disabled=true; this.value='Submitted...';doSubmit('XXXXXX');}
In either case you should change the value
of XXXXXX to be the same as the name of the button. This is the value that
REQUEST will be set to when the button is clicked. By setting it to be the same
as the name of the button it means that you can still use “When Button Pressed”
conditions for this button.
Method
2:
Paste this in the attribute property-
onmouseup="this.disabled=true;doSubmit('XXXX');"Note:-XXXX
is the name of the button.
Let's consider below tabular form to demo this topic that is Emergency Contact Details.
Suppose that we have to access the all the Emergency Contact Names of the user Akshay Patil.


Suppose that we have to access the all the Emergency Contact Names of the user Akshay Patil.
Write JavaScript function to traverse through tabular form as shown below.
function display()
{
for (var i = 0; i < document.wwv_flow.f04.length; i++)
{
var vTemp=$(document.wwv_flow.f04[i]).val();
alert(vTemp);
}
}
where ,
Oracle Apex allows only one tabular form on one page so undoubtedly document.wwv_flow access particular tabular form on that page.
f04 is the tabular form column name so, document.wwv_flow.f04.length returns the length that is number of rows in tabular form.
Therefore, to identify the name of your tabular form column do following:
1. Right Click on column item
2. Select Inspect element.
3. Use the name shown in Inspect Element Window.
The Apex JavaScript API has some very convenient functions to access the values of page items.
For example, if you wante to access the contents of a text field with JavaScript, would need to reference it something like this:
$x("P7_TEXT_FIELD").value;
or
$("#P7_TEXT_FIELD").val();
If the item you want to reference is a display only item, then the syntax changes:
x = $("#P7_DISPLAY_ONLY").text();
If you need to set the values of these items, the you need to use the varying syntax as well:
$x("P7_TEXT_FIELD").value = "Hello World!";
or
$('#P7_TEXT_FIELD').val("Hello World!");
or
$("#P7_DISPLAY_ONLY").text("Hello World!");
Dealing with these various syntax constructs can be confusing. Fortunately the Apex JavaScript API makes this process much easier. To get page item values simply use $v(“<item_name>”):
x = $v("P7_TEXT_FIELD");
y = $v("P7_DISPLAY_ONLY");
To set the item values use:
$s("P7_TEXT_FIELD","Hello World!");
$s("P7_DISPLAY_ONLY","Hello World!");
See an example on my demo page.
The $v2() is handy if you need to access multiple items in an array. For example multiple selections from check boxes or from a shuttle control can be fetched as an array and handled that way in JavaScript:
myArr = $v2("P7_SHUTTLE_CONTROL");
for (idx=0; idx<myArr.length; idx++) {
//do something with myArr[idx];
}
To set region width automatically perform following steps:
1. Set region id as shown below

2. Add following code in region header and footer block to set Scroll bar on overflow.
<div style="overflow: auto;" >...</div>
3. Write dynamic action to set screen width to region.
Add below code in dynamic action :
var v_size = screen.width;
$('#dependent_data').width(v_size);

where, "dependent_data" is a region id.
screen.width returns window size.
Though there are multiple ways to do this, here is the
simple way to make tabular form read-only or disable in oracle apex.
Use following syntax to make tabular form column read-only
or disable.
$(document.wwv_flow.f05).attr('disabled',true);
$(document.wwv_flow.f05).attr('readonly',true);
Where,
f05 is the name of the column.
Oracle
Apex support only one tabular form on one page therefore undoubtedly document.wwv_flow access the tabular form on our page.
Therefore,
to identify the name of your tabular form column do following:
1.
Right Click on column item
2.
Select Inspect element.
3. Use
the name shown in Inspect Element Window.

You are Facing This
Error because the fields in your query are not matching with the report fields.
Take following
precautions while adding query to report query window
- Use "Read Field" button in Report query
window, it fill Fields variables with the fields of the query and avoid
later problems.
- The length of the field $F {name} shouldn't exceed 32
characters (field < 32).
See below screenshot to
get the clear idea about the window where you need to focus.

Note : For best practice use aliases for Subqueries/DECODE/NVLstatements in your main query to avoid further issues.
A. Install XE 11g
1. Download Oracle XE 11g for Windows 32-bit
2. Unzip the downloaded file OracleXE112_Win32.zip.
3. Move inside folder Disk1 -> and run setup.exe file (Double Click file).


4. Verify if XE installed.
From Run, type cmd.
In cmd window, connect as sys with sysdba
Command: sqlplus / as sysdba
select name, open_mode, log_mode from v$database;

5. Type exit in sqlplus to quit.
B. Install APEX4.2
1. Download APEX4.2 from Oracle Site for Windows 32-bit.
a. Run -> Type cmd -> In cmd window, login in sqlplus as sys with sysdba
Command: sqlplus / as sysdba
If above command fails then try this: sqlplus /@//localhost:1521/XE as sysdba;
b. Find the path where data files are stored.
Command: select file_name from dba_data_files;
c. Create tablespace and give the obtained file path as data file path.
Command: create tablespace apex datafile ‘C:\ORACLEXE\APP\ORACLE\ORADATA\XE\apexdata01.dbf’ size 1G autoextend on;

4. Type exit to quit sqlplus.

6. Now, in this path, login in sqlplus as sys with sysdba
Command: sqlplus / as sysdba
If above command is not working try this : sqlplus /@//localhost:1521/XE as sysdba;

7. Run the script apexins.sql
Command: @apexins.sql apex apex TEMP /i/;
Where apex=apex tablespace , TEMP= temporary tablespace, /i/=image path
This starts installation of APEX4.2. It takes about 30 minutes to complete installation.

/* For Information…………………………………………………………………………………………………………………………………….
When Oracle Application Express installs, it creates three new database accounts:
· APEX_040200 - The account that owns the Oracle Application Express schema and metadata.
· FLOWS_FILES - The account that owns the Oracle Application Express uploaded files.
· APEX_PUBLIC_USER - The minimally privileged account is used for Oracle Application Express configuration with Oracle Application Express Listener or Oracle HTTP Server and mod_plsql.
If you configured RESTful Web services, then these additional accounts will be created:
· APEX_REST_PUBLIC_USER - The account used when invoking RESTful Services definitions stored in Oracle Application Express.
· APEX_LISTENER - The account used to query RESTful Services definitions stored in Oracle Application Express.
-------------------------------------------------------------------------------------------------------------------------------------*/
8. After installation, log file gets generated in your apex folder location.
Log file has following entry:
8. After installation, log file gets generated in your apex folder location.
Log file has following entry:

9. Now, check the validity of installation.
In cmd, login in sqlplus with sys as sysdba and run the below command:


10. Change the Password for the ADMIN Account
Now, in cmd window, go to and inside apex folder using cd
Login as sys with sysdba
Execute the below script:
@apxchpwd.sql
It will prompt for admin password. Give it.
11. Configure RESTful Services (Optional)
a. Now, in cmd window, go to and inside apex folder using cd
b. Login as sys with sysdba
c. Execute the below script:
@apex_rest_config.sql
When prompted, enter a password for the APEX_LISTENER and
APEX_REST_PUBLIC_USER accounts.
APEX_LISTENER ->xxx
APEX_REST_PUBLIC_USER -> xxx
/* For information……………………………………………………………………………………………………………………………………………………..
When configuring RESTful Services in Oracle Application Express, it creates two new database accounts:
· APEX_LISTENER - The account used to query RESTful Services definitions stored in Oracle Application Express.
· APEX_REST_PUBLIC_USER - The account used when calling RESTful Services definitions stored in Oracle Application Express.
---------------------------------------------------------------------------------------------------*/
12 . Unlock APEX_PUBLIC_USER account
a. Login as sys with sysdba
b. Execute below commands:
ALTER USER APEX_PUBLIC_USER ACCOUNT UNLOCK;
ALTER USER APEX_PUBLIC_USER IDENTIFIED BY xxx;
b. Execute below commands:
ALTER USER APEX_PUBLIC_USER ACCOUNT UNLOCK;
ALTER USER APEX_PUBLIC_USER IDENTIFIED BY xxx;
13. View JOB_QUEUE_PROCESSES from SQL*Plus
a. Login as sys with sysdba
b. Execute below command:
SELECT VALUE FROM v$parameter WHERE NAME = 'job_queue_processes'

ALTER SYSTEM SET JOB_QUEUE_PROCESSES =20;

14. Grant Connect Privileges
a. Login as sys with sysdba
b. Copy-Paste below code in sqlplus and run it (/ command).
DECLARE
ACL_PATH VARCHAR2(4000);
BEGIN
-- Look for the ACL currently assigned to '*' and give APEX_040200
-- the "connect" privilege if APEX_040200 does not have the privilege yet.
SELECT ACL INTO ACL_PATH FROM DBA_NETWORK_ACLS
WHERE HOST = '*' AND LOWER_PORT IS NULL AND UPPER_PORT IS NULL;
IF DBMS_NETWORK_ACL_ADMIN.CHECK_PRIVILEGE(ACL_PATH, 'APEX_040200',
'connect') IS NULL THEN
DBMS_NETWORK_ACL_ADMIN.ADD_PRIVILEGE(ACL_PATH,
'APEX_040200', TRUE, 'connect');
END IF;
EXCEPTION
-- When no ACL has been assigned to '*'.
WHEN NO_DATA_FOUND THEN
DBMS_NETWORK_ACL_ADMIN.CREATE_ACL('power_users.xml',
'ACL that lets power users to connect to everywhere',
'APEX_040200', TRUE, 'connect');
DBMS_NETWORK_ACL_ADMIN.ASSIGN_ACL('power_users.xml','*');
END;
/
COMMIT;


15. Follow this step only if error arise in Step 14
Troubleshooting an Invalid ACL Error
If you receive an ORA-44416: Invalid ACL error after running the previous script, use the following query to identify the invalid ACL:
REM Show the dangling references to dropped users in the ACL that is assigned
REM to '*'.
SELECT ACL, PRINCIPAL
FROM DBA_NETWORK_ACLS NACL, XDS_ACE ACE
WHERE HOST = '*' AND LOWER_PORT IS NULL AND UPPER_PORT IS NULL AND
NACL.ACLID = ACE.ACLID AND
NOT EXISTS (SELECT NULL FROM ALL_USERS WHERE USERNAME = PRINCIPAL);
Next, run the following code to fix the ACL:
DECLARE
ACL_ID RAW(16);
CNT NUMBER;
BEGIN
-- Look for the object ID of the ACL currently assigned to '*'
SELECT ACLID INTO ACL_ID FROM DBA_NETWORK_ACLS
WHERE HOST = '*' AND LOWER_PORT IS NULL AND UPPER_PORT IS NULL;
-- If just some users referenced in the ACL are invalid, remove just those
-- users in the ACL. Otherwise, drop the ACL completely.
SELECT COUNT(PRINCIPAL) INTO CNT FROM XDS_ACE
WHERE ACLID = ACL_ID AND
EXISTS (SELECT NULL FROM ALL_USERS WHERE USERNAME = PRINCIPAL);
IF (CNT > 0) THEN
FOR R IN (SELECT PRINCIPAL FROM XDS_ACE
WHERE ACLID = ACL_ID AND
NOT EXISTS (SELECT NULL FROM ALL_USERS
WHERE USERNAME = PRINCIPAL)) LOOP
UPDATE XDB.XDB$ACL
SET OBJECT_VALUE =
DELETEXML(OBJECT_VALUE,
'/ACL/ACE[PRINCIPAL="'||R.PRINCIPAL||'"]')
WHERE OBJECT_ID = ACL_ID;
END LOOP;
ELSE
DELETE FROM XDB.XDB$ACL WHERE OBJECT_ID = ACL_ID;
END IF;
END;
/
REM commit the changes.
COMMIT;
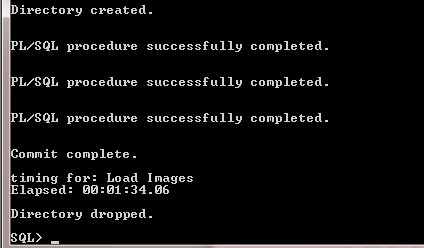
16. Load images (Specify the image directory):
a. Now, in cmd window, go to and inside apex folder using cd
b. Login as sys with sysdba
c. Execute the below script:
Command: @apxldimg.sql
When prompted, enter value for 1 (image directory )
eg: C:\apex4.2
OR
@apxldimg.sql C:

1 17. Enable Oracle XML DB HTTP Server
In sqlplus, execute the below command:
EXEC DBMS_XDB.SETHTTPPORT(8080);
Commit;

1 18. Launch APEX4.2 using below URL:

1 19. If you are not able to access Apex URL with IP address then Make global Access to Apex URL
EXEC DBMS_XDB.SETLISTENERLOCALACCESS(FALSE);
This procedure restricts all listener end points of the XML DB HTTP server to listen either only on the localhost interface (when l_access is set to TRUE) or to listen on both localhost and non-localhost interfaces (when l_access is set to FALSE).
2 20 . SQL> ALTER USER ANONYMOUS ACCOUNT UNLOCK;
User altered.
ALTER USER anonymous ACCOUNT UNLOCK;
ALTER USER xdb ACCOUNT UNLOCK;
ALTER USER apex_public_user ACCOUNT UNLOCK;
ALTER USER flows_files ACCOUNT UNLOCK;
SQL> select username,account_status from dba_users;
SQL> alter user APEX_040200 identified by Jade_123;
SQL> alter user xdb identified by Jade_123;
SQL> alter user FLOWS_FILES identified by Jade_123;
SQL> alter user APEX_040000 account lock;
3 21. If the Apex URL is only working on local machine but not on another.
Then do the firewall setting for the port that you have set in above steps.
Control Panelà Windows Firewall àAdvance Setting àclick on Inbound Rules à Add new Rule by right click on Inbound Rules àspecify the port numbers that are involved such as 8080 of apex, 1521 of 11g.


